Last year I posted pictures of a carving vise. It was featured in Woodcarving Illustrated Magazine issue #5 from 1998. The article was written by Lynn Diel, and all credit goes to him. I only made one change to the vise to increase the gripping power when using it with large carvings. I received a lot of comments and questions about exactly how to build this vise. Hopefully this will help. I used black steel pipe and fittings except for the 3/8" pipe and flange, I could only find galvanized at the local hardware. Galvanized will cost you 30 - 40% more.
First a list of the parts needed -
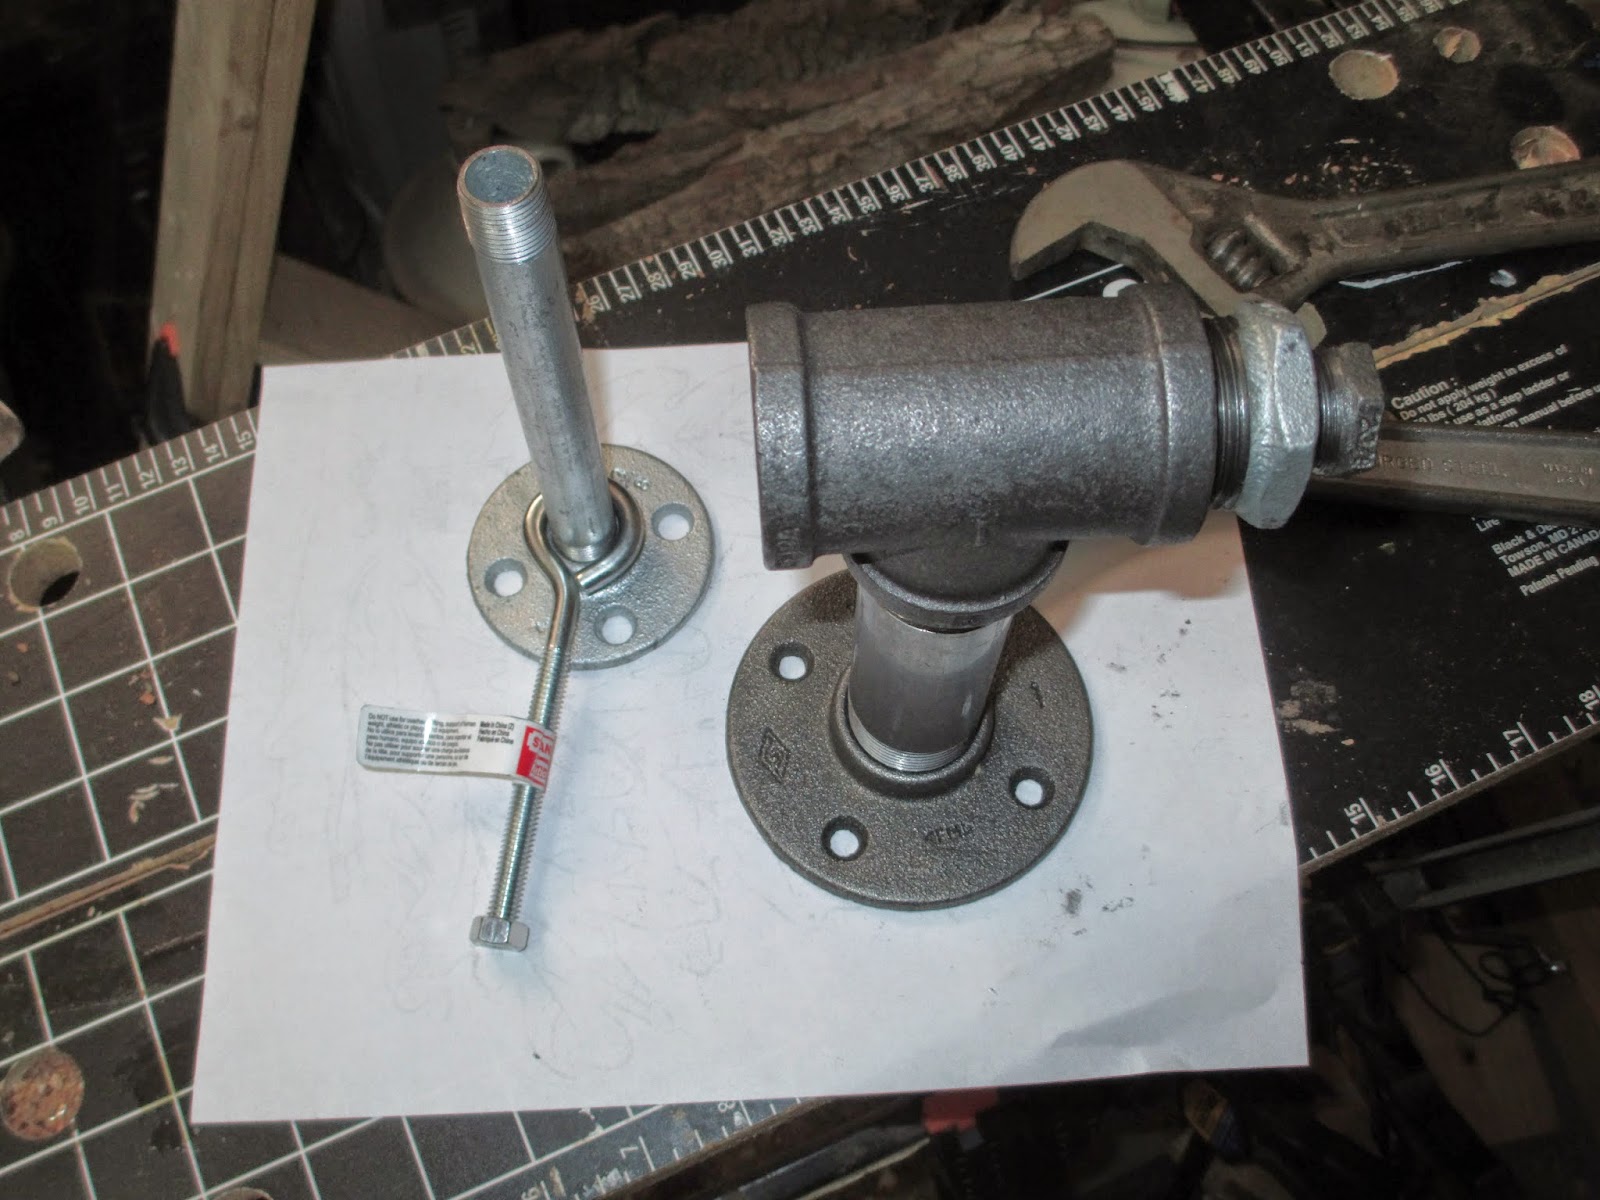
1 - 1" pipe flange
1 - 4" or 6" length of 1" pipe (nipple)
1 - 1" pipe tee
1 - 1" to 1/2" pipe reducer
1 - 1/2" to 3/8" pipe reducer
1 - 3/8" pipe flange
1 - 6" length of 3/8" pipe (nipple)
1 - 5/16" eyebolt with washer and nut, 6" length
Approximate cost $30
Assembling the parts is pretty straight forward.
Here is the one change I made. If you are only going to use your vise for carving with hand tools you can bypass this step. But, if you want it to hold larger carvings and to use with mallet tools, this will prevent the vise from slipping. I made four notches on one end of the pipe tee with a hand grinder. This allows the 3/8" pipe that is holding the carving to set horizontal or vertical.

The black steel has an oily film.You need to clean the vise before applying a couple coats of good primer, and two coats of paint. If you used galvanized steel you can skip this step.


Secure your vise to a solid work surface, or to a board you can clamp to a bench or table. I attach the carving to the 3/8" pipe flange with drywall screws drove in at angle toward the center. If you like to work on more than one carving at a time, like me, buy an extra 3/8" pipe and flange. You can leave them attached and switch from one carving to another.
Happy Carving